
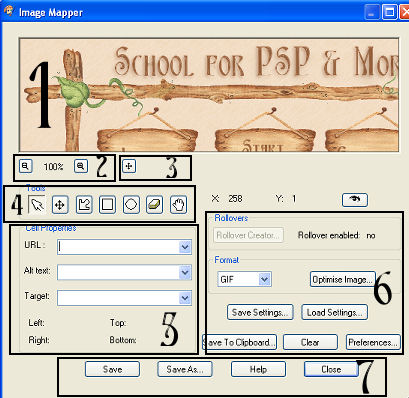
I have included the map again on this page so that those of you that work on the web do not have to keep flicking back and forth between pages. Although I would strongly recommend that you print this tutorial off so that it is easier to follow.

After we have created the image map we then need to assign the urls, alternate text and targets for the individual cells.
Using your mover tool (Section 3 on the map) make sure in the view window we have the top three signs.
Using the pan tool (Section 4 number 1 tool) click on the first sign - Join up.
We know that the first sign is now active because it has the green selection box round the sign.
On Section 5 of the map we are now going to use the properties tools.
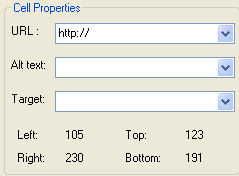
In the url box type the url link for the join up page. Eg. http:// is already there so we just need to add www.yoururl.com
In the Alt text box. I personally leave this blank but that will depend on the individual. But, should you wish to use this box , anything that is typed in here will be displayed if image doesn't load or if the user has images disabled in their Web Browswers. Also in some versions of Windows Explorer it will appear as a little text box over your pic to give a tool tip.
In the Target box select the target frame in which to open the new linked page.
_blank - Will load the page in a new browser window
_parent - Will load the page in the parent frameset of the link.
_self - Loads the linked page in the same frame as the link
_top - Loads the linked page in the full browser window and removes all frames
If you use iframes then this is where you would also use an iframe target.
Top, Bottom, Left and Right these figures will change with each sign that you are dealing with. Its telling the property settings of the picture where the sign is positioned in the picture.
We have now assigned our first sign in the picture.
Using the pan tool (Section 4 number 1 tool) click on the second sign - Start Here.
We know that the second sign is now active because it has the green selection box round the sign and the first sign selection box is now red.
In the cell properties box do exactly the same as you did above.
Continuing assigning all the different signs until they are all done.
At anytime you can preview your work in your web browser by clicking on the eye which is poistioned just above Section 6 on our Map

Go ahead click on the eye , your picture will open up in a new browser window. Dont worry at this stage if the picture looks very pixellated or blurred its because we havent saved it in the correct format yet. Click on one our signs and if you have correctly linked it then the linked page will open up. Wooohooooo great arn't you clever (wink, wink).
Ok our job is not done yet we want to get these settings saved incase anything happens to our psp. We dont want to have to do all of that again.
Before we save, as we are doing the our image map in order In Section 6 of our map rollover is next
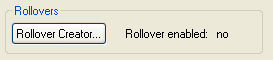
Rollover images is when we assign different movements to our buttons so that when the mouse rolls over or is depressed the image may change. For the purpose of this tutorial we will not be covering this item. But would come under a Slicing Images tutorial which I hope to cover at a later date. So the setting for Rollover will stay as per the above screenshot.
If you have any queries or find any mistakes please dont hesitate to contact me:-

Please feel free to link to this tutorial, and/or print it out for your own personal use, but do not copy it in any way to put on-line, pass out, or re-write without my permission. Any resemblance to any other tutorial like this is purely coincidental.
Please respect my work by not claiming it as you own.
**NOTE--You may do anything you like with your results from these tutorials except make a profit from them. You got your results for free so let's keep it that way. Thank you! :o)
Created 20th October 2005. ©Copyright Tbab.co.uk
Property of Shelley Marlow
|
|
|
|