
Created 15th April 2005. ©Copyright Tbab.co.uk
Property of Shelley Marlow
Today we are going to learn how to make a very simple watermark that we can use on all of our work.
This tutorial is written
and made in Psp Version 9 and assumes you have a working knowledge of Psp. It can be
made in earlier versions of Psp with a few adjustments, but for this tutorial I will
only be explaining how it was made in version 9.
You will need:-
JASC's PSP (free 30 day trial) which you can get here
Let's get started:-
Step One
Open a new image 300 x 100 pixels, black background, remove the check mark from transparent as below:-

Step Two
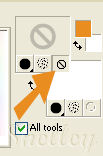
Activate your text tool.  and click on your black background. and click on your black background.
Foreground colour null (null means we turn off the colour by pressing the button where my arrow is pointing)
Background colour - white
Choose a nice clear font not too thin. I chose to create as Floating Caligula Size 30

But you can choose whatever font or size you would like to use. I have kept mine at a sensible size so that it can be used on large or small pictures alike.
Go to selections/select none
Step Three
Activate your crop tool 
What we want to do is draw a box around the wording, we need to crop away some of the black background , make sure we dont lose any of our name. Like below :-
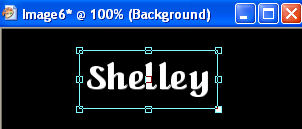
Double click inside the box you have just created and the picture will be cropped to size.

Step Four
Go to Effects/Texture Effects/Emboss and we now have something like this

Let's save this picture as a psp file then we can use it whenever we need to watermark our work. Once saved do not close.
Step Five
Open up any picture that you have made, perhaps one of your previous lessons.
Step Six
Activate your watermark once more. Go to Edit/Copy.
Activate your picture that you have just opened. Go to Edit/Paste/Paste as new layer.

Use your mover tool  to position your watermark anywhere on the top of your picture. to position your watermark anywhere on the top of your picture.
Looks ghastly at the moment doesn't it do not worry we are going to cure that.
Step Seven
On your layer pallette . Your top layer should be the watermark. Can you see where my arrow is pointing, click on the drop down arrow and choose soft light.
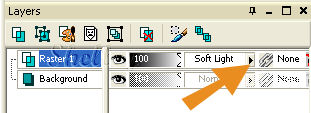
Hey presto this is what we have isnt that better!!
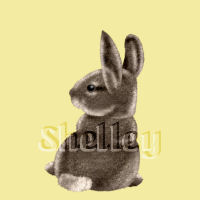
Congratulations you have just learnt how to watermark your work. This is a very useful lesson to learn and to put into constant practise. There is nothing worse than making a beautiful picture which is your own creation for somebody else to come along and claim as theirs.
If you have any queries please dont hesitate to contact me:-

Please feel free to link to this tutorial, and/or print it out for your own personal use, but do not copy it in any way to put on-line, pass out, or re-write without my permission. Any resemblance to any other tutorial like this is purely coincidental.
Please respect my work by not claiming it as you own.
**NOTE--You may do anything you like with your results from these tutorials except make a profit from them. You got your results for free so let's keep it that way. Thank you! :o)
Created 15th March 2005. ©Copyright Tbab.co.uk
Property of Shelley Marlow
|
|
|
|