Created 30th March 2005. ©Copyright Tbab.co.uk
Property of Shelley Marlow
Today we are going to take a plain outline pattern and give it a stained glass effect.
This tutorial is written
and made in Psp Version 9 and assumes you have a working knowledge of Psp. It can be
made in earlier versions of Psp with a few adjustments, but for this tutorial I will
only be explaining how it was made in version 9.
You will need:-
JASC's PSP (free 30 day trial) which you can get here
My Supplies :- The outline pattern for our rose and also a plain glass pattern, both need to be saved in your my documents and we will open them up in your psp as normal pictures. You can get your supplies here
Let's get started:-
Step One
Unzip the supplies folder in your my documents. In your psp open the file roseinheart.gif
Go to Windows/Duplicate
Close the original.
Open in your psp the glass.jpg. Go to windows/Duplicate. Close the original.
Minimise your glass jpg. On your workspace you should now have your roseinheart.gif
Step Two
Go to Image/Increase colour depth/16million colours (24bit).
Activate the zoom tool  Then click on your image twice to take the zoom in to about 150% Then click on your image twice to take the zoom in to about 150%
Step Three
Activate your Magic Wand Tool  . Then set your magic wand with the following settings. . Then set your magic wand with the following settings.

Once you have your settings click on the black outline of your picture, so that all the outline is selected. If you select an area where a lot of the lines merge into one all the outline should be selected all at once. The marching ants should now be all around the outline.
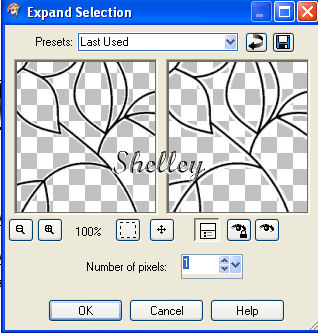
Go to Selections/Modify/expand Number of pixels 1

Step Four
Set your Foreground colour at #808080 a medium grey
Select your Floodfill tool  and floodfill inside the marching ants. You should now have something like this and floodfill inside the marching ants. You should now have something like this

Step Five
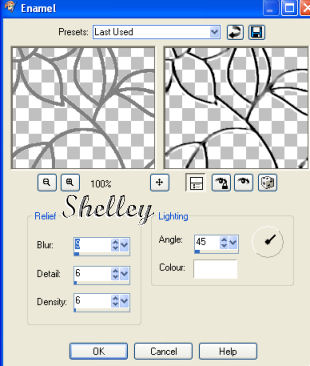
With your marching ants still selected, go to effects/artistic effects/enamel and use these settings. Blur 9, Detail 6, Density 6, Angle 45, Colour White.

Go to Selections/select none.
Step Six
Now we are going to start colouring in.
Select your magic wand  and change your settings to the following and change your settings to the following

With your magic wand select the insides of all the leaves
Step Seven
Remember we opened our glass image right back at the beginning and we minimised it. Let's maximise it so we can work on the glass. Go to Windows/Duplicate and just for good luck lets have another duplicate also.
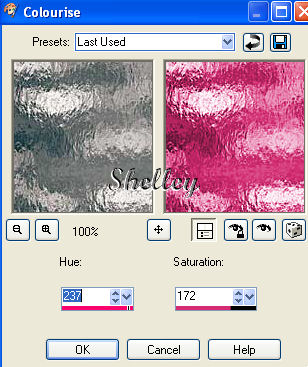
On one of the copies of our Glass image go to Adjust/Hue and Saturation/Colourise

Move the sliders underneath Hue and Saturation to the left and the right until you are happy with a colour you would like to use for your leaves. Once your happy click Ok.
Step Eight
Activate our rose image again. When we left the image last time we had just selected the inside of the leaves. So your marching ants should still be visible on the insides of all the leaves.
We need to make our colour glass the pattern on our foreground colour. So on your foreground colour, double click and get our box up

Click on pattern, under Category click all and find your coloured glass you have just made and select. Angle 0 , Scale 100.
Step Nine
Select your floodfill tool  and floodfill the leaves with the coloured glass pattern. and floodfill the leaves with the coloured glass pattern.
You should have something like this now

Go to Selections/Select None
Step Ten
Follow steps six through till nine for each part of the rose that you wish to colour in.
Im leaving the choice of colours up to you, so this can truly be your own artwork.
For group tutorial purposes please use the materials provided and dont forget to put your name on using the text tool before posting to your group.
If you have any queries please dont hesitate to contact me:-

Please feel free to link to this tutorial, and/or print it out for your own personal use, but do not copy it in any way to put on-line, pass out, or re-write without my permission. Any resemblance to any other tutorial like this is purely coincidental.
Please respect my work by not claiming it as you own.
**NOTE--You may do anything you like with your results from these tutorials except make a profit from them. You got your results for free so let's keep it that way. Thank you! :o)
Created 30th March 2005. ©Copyright Tbab.co.uk
Property of Shelley Marlow
|
|
|
|