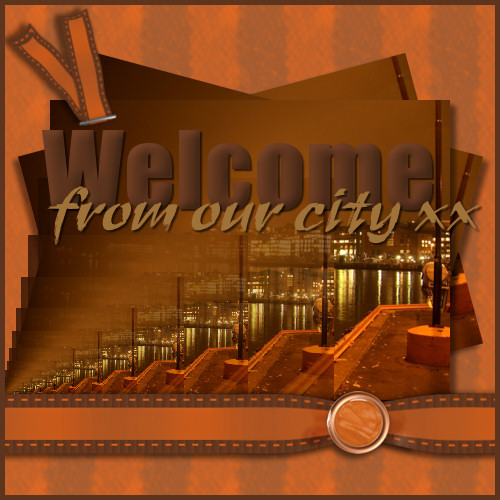
Reflections
This tutorial was written by me on March 18th, 2008 and any
resemblance to other tutorials is purely coincidental.
You may use this tutorial for personal use only. Do not
distribute in other groups, post on a website or send
in email without express permission of me,
This is done in PSP XI but could probably be done
in other versions.
Please DO NOT script my tutorial.
For this tutorial you will need:
PSP XI or any other version. You can download a demo here.
Supplies :- which include an image which is © to sxc.hu - you may visit them here
a mini scrapkit © Shelley Marlow - you may visit her site here
You can pick up the supplies here
Fonts - Impact which you can get here
& Ruach LET which you can get here
OK…ready? Let's get started! Please be sure to save often.
1. Open up your supplies files into your workspace and then minimise
2. Open up a new 500 x 500 pixel transparent image
Flood fill with white colour
3. Maximise your smreflectmini08 psp file
In the layer pallette select the layer named background
Edit/Copy then minimise this file
Go back to your working image
Edit/Paste as a new layer
Reduce the opacity of this layer to 95
4. Maximise the photo-city-view-3.jpg
Windows/Duplicate
Close the original
Working on the duplicate of the photo
Go to Image/Resize and use the following settings
Go to Edit/Copy
You may now close down this image
5. Go back to your working image
Edit/Paste as a new layer
Go to layers Duplicate
Then repeat Layers/Duplicate again
We should now have a total of three photo layers.
Right click on each of these layers and rename 1, 2 and 3 starting at the
bottom of your layer pallette.
Your layer pallette should now look like this :-
6. Highlight layer named 1 in your layer pallette
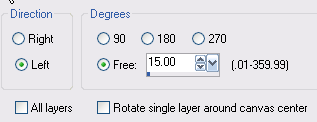
Go to Image/Rotate/Free Rotate
and use the following settings:-
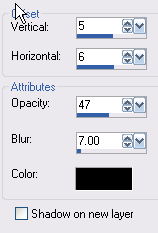
Effects/3D Effects/Drop Shadow
7. Highlight layer named 2 in your layer pallette
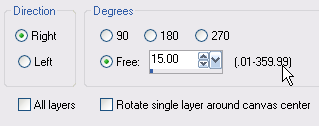
Go Image/Free Rotate
and use the following settings:-
8. Highlight layer named 3 in your layer pallette
Maximise your smreflectmini08 psp file
In the layer pallette select the layer named ribbon1
Edit/Copy then minimise this file
Go back to your working image
Edit/Paste as a new layer
9. Using your mover tool move the ribbon1 down so that it covers the bottom edge
of your photos. See my main header above for placement.
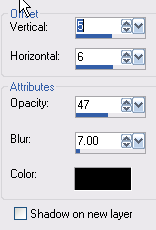
Effects/3D Effects/Drop Shadow
Repeat the drop shadow changing the vertical setting to -3 (minus 3)
and horizontal to 0 the rest of the settings leave the same
10. Highlight layer named 3 in your layer pallette
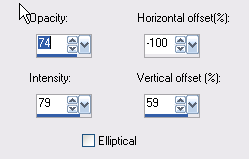
Effects/Reflections Effect/Feedback
and use the following settings
11. In your layer pallette select your top layer
Maximise your smreflectmini08 psp file
In the layer pallette select the layer named ribbon2
Edit/Copy then minimise this file
Go back to your working image
Edit/Paste as a new layer
12. Using your mover tool move the ribbon2 to the top left hand corner
it should partially cover the the corner of the photographs
See my main header above for placement.
Effects/3D Effects/ Drop Shadow
Repeat the drop shadow changing the vertical setting to -3 (minus 3)
and horizontal to 0 the rest of the settings leave the same
13. Select your text tool using the settings as below
In your materials pallette change your background colour to #5d341e
On your workspace type out your message
In your layer pallette, right click on the vector layer and convert to raster layer
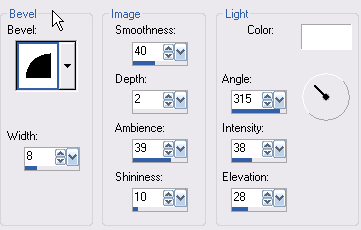
Effets/3D Effects/Inner Bevel
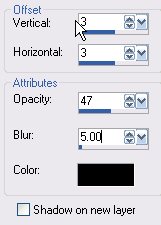
Effects/3D Effects/Drop Shadow
14. Make sure your text tool is selected still and change the settings to the following:-
Change your background colour to #9f723a
On your workspace type out your message
In your layer pallette, right click on the vector layer and convert to raster layer
Add the same drop shadow as we did on our last piece of text.
15. Add a new raster layer
Selections/Select All
Selections/Modify/Contract by 5
Selections/Invert
Flood fill with background colour of #5d341e
Make sure you put your watermark on your work
Please place any © information that is needed on to your work also
Save as jpg. You are all done!!!
Now you have learnt how to use the Reflection/Feedback tool why not play with the settings
I hope you have enjoyed this tutorial.
If you have any comments or questions, please email me here.
Copyright © 2008 Shelley Marlow
All Rights Reserved
|