Created 11th April 2006. ©Copyright Tbab.co.uk
Property of Shelley Marlow
This is going to be a very quick tutorial on how to deal with basic Red eye on your photographs.
This tutorial is written
and made in Psp Version 8 and 9 and assumes you have a working knowledge of Psp. It can be
made in earlier versions of Psp with a few adjustments.
You will need:-
JASC's Psp (free 30 day trial) which you can get here
Supplies - which you can get here (The photo is supplied by Jasc as part of their sample images for Photo Album5 so it is copyright free)
Let's get started:-
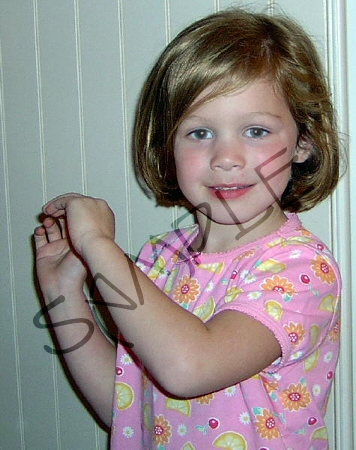
Open the image i have supplied of the young girl, we are going to remove her red eyes and try and make them look as normal as possible
Psp8 users - Go to Adjust/Red eye removal
Psp9 users - From your photographic toolbar menu select the red eye tool . If you cannot see your photographic toolbar then go to View/toolbars/photo
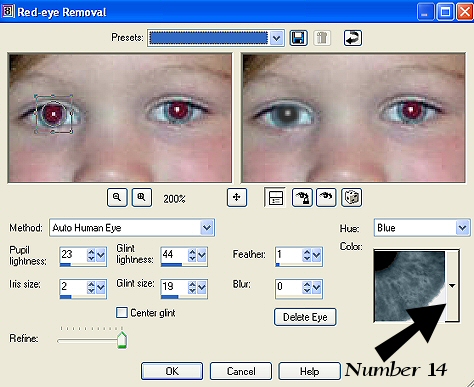
A new box will appear like so:-
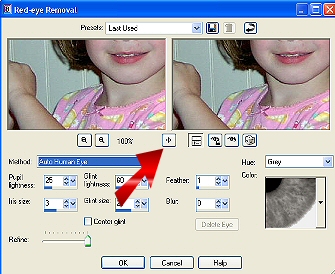
Click and hold down the navigate button where my arrow is pointing to in the above screen shot.
As you do this the picture of the girl will appear you want to still be holding your mouse button down but move your mouse so that the bounding box moves around the girls eyes.
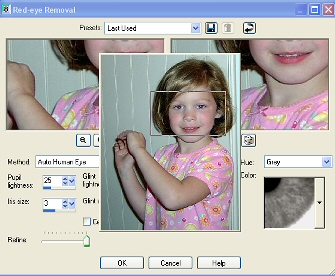
once its where you want it you may let your mouse button go
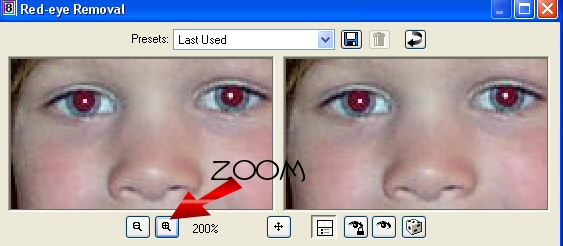
The eyes of the girls should now be in both of the picture boxes. Now using your zoom tool in this box click on it a couple of times until you are zoomed in to about 200% if you need to move the girls eyes again so you can see them use the navigate button like you did above.
We are now going to be working on the left hand picture only, the right hand picture shows you the results of what it will look like when you apply the changes.
Lets work on the left hand eye. Put your mouse over the left hand eye and you will see your cursor has changed to a Cross.
Drag your mouse over the red eye as if you was drawing a circle don't worry if its not quite in the right place we can move it. As you let go of the mouse it will have a bounding box around the circle, your mouse will now change from a cross to the mover tool
Move your circle so that it covers the red eye if you need to make it smaller or bigger use the bounding box nodes.
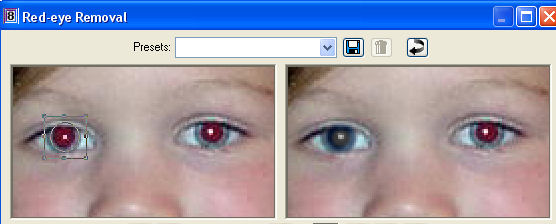
Can you see that where we have placed the circle over the left eye in the left hand picture that in the right hand picture its changed to whatever your settings are at present, don't worry if it doesn't look right we are now going to change the settings.
Now change your settings to the following, but DO NOT press Ok yet.
now we want to draw a circle over the right eye. Notice you still have a circle over the left eye but the bounding box is now over the right eye. You can go back and forth to each eye just by clicking on it, wherever the bounding box is, is the eye that is active. You do not need to change any settings because they are the same as the left eye. Once your happy with how your eye looks press ok.
Hey presto this is what we should have our treasured photo minus the red eyes. Quite a tool eh!!
For group tutorial purposes please use the materials provided and don't forget to put your name on using the text tool before posting to your group.
If you have any queries please don't hesitate to contact me:-

Please feel free to link to this tutorial, and/or print it out for your own personal use, but do not copy it in any way to put on-line, pass out, or re-write without my permission. Any resemblance to any other tutorial like this is purely coincidental.
Please respect my work by not claiming it as you own.
**NOTE--You may do anything you like with your results from these tutorials except make a profit from them. You got your results for free so let's keep it that way. Thank you! :o)
Created 11th April 2006. ©Copyright Tbab.co.uk
Property of Shelley Marlow
|
|
|
|