
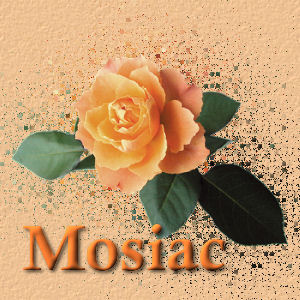
Created 9th March 2005. ©Copyright Tbab.co.uk
Property of Shelley Marlow
Today we are going to learn how to create a simple mosiac effect using a picture tube and the tools that come with psp9. No plug-ins are used within this tutorial.
This tutorial is written
and made in Psp Version 9 and assumes you have a working knowledge of Psp. It can be
made in earlier versions of Psp with a few adjustments, but for this tutorial I will
only be explaining how it was made in version 9.
You will need:-
JASC's PSP (free 30 day trial) which you can get here
My zipped file which contains the orange rose tube and you can get here
Let's get started:-
Step One
First of all I want you to download the above file which is the tube, that we are going to be using for this tutorial. Save it to your mypspfiles/picture tubes. Unzip the file inside that folder. Then open your psp programme.
Step Two
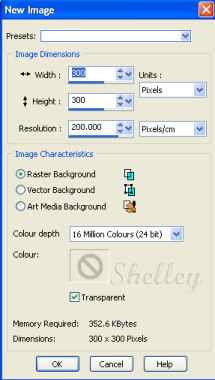
Click  or go to File/New and open a new image 300 x 300 pixels raster background, transparent image. or go to File/New and open a new image 300 x 300 pixels raster background, transparent image.
Step Three
Click on your picture tube tool 

Can you see my the small picture of the orange rose, it has a little arrow next to it, click that arrow and a drop down box will appear with all of your tubes find the sm-orangerose tube and click on it. Then use the settings as I have shown above
On the centre of your new image click once, and the picture of the rose should appear as below
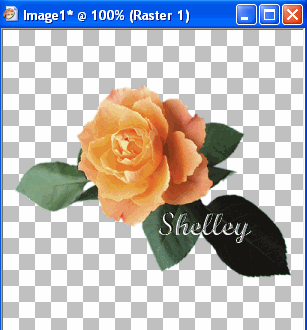
If you need to center up your rose in the middle dont panic click the move tool  then drag the rose to the centre of your workspace. then drag the rose to the centre of your workspace.
Step Four
Go to Windows/Duplicate to make a second copy of our rose image.
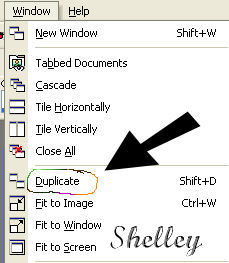
Make one of our images smaller on your workspace by clicking the small dash in the top right hand corner of your image. In other words minimise one of the pictures

Step Five
On the other image that we have remaining at full size on our workspace, we are going to now start putting some effects on.
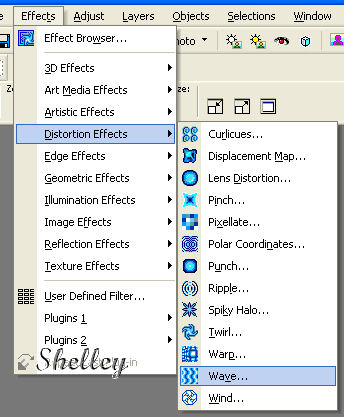
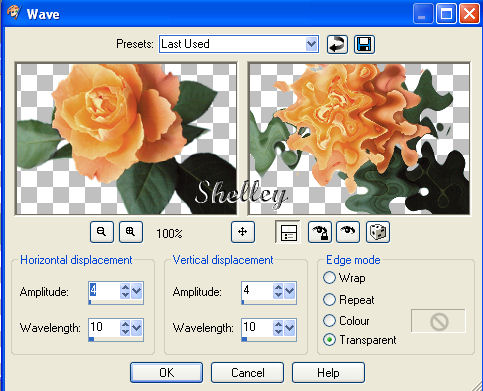
Go to Effects/Distortion Effects/Wave the following box will appear.
Set your settings exactly as mine are below
Step Six
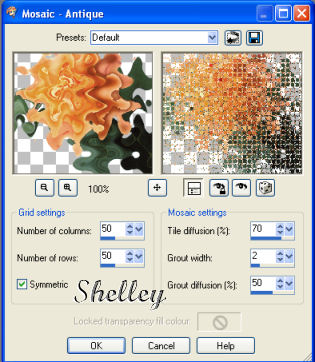
Go to Effects/Texture Effects/Antique Mosaic, the following box will appear, click the little arrow at the top (which is the default button) and make sure your settings are the same as mine below.
Step Seven
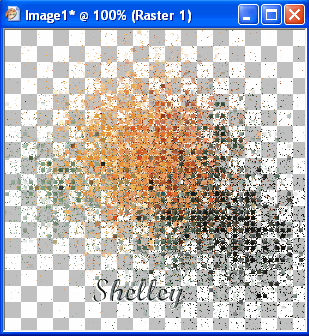
Repeat steps five and six. Your image should now look like this.
Step Eight
Now remember the duplicate image that we minimised earlier, bring it back up again.
Make sure that picture of the rose with no effects on it is active.
Go to Edit/Copy.
Click on the rose effects picture we were just working on to make it active.
Go to Edit/Paste as new layer
Step Nine
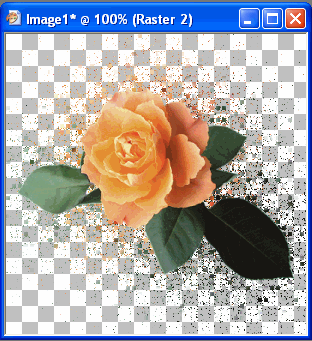
Go to Layers/Merge/Merge Visible
Step Ten
Save your work as a jpeg.
There now we are all done, congratulations you now have made yourself a cute tag, using the wave and mosiac effects. Why not have a practise and play with all the different settings that you can find within the effects menu and see what you come up with. Don't panic you can always click default so that you can go back to the beginning again!!
For group tutorial purposes please use the materials provided, follow the exact tutorial and dont forget to put your name on using the text tool before posting to your group.
If you have any queries please dont hesitate to contact me:-

Please feel free to link to this tutorial, and/or print it out for your own personal use, but do not copy it in any way to put on-line, pass out, or re-write without my permission. Any resemblance to any other tutorial like this is purely coincidental.
Please respect my work by not claiming it as you own.
**NOTE--You may do anything you like with your results from these tutorials except make a profit from them. You got your results for free so let's keep it that way. Thank you! :o)
Created 9th March 2005. ©Copyright Tbab.co.uk
Property of Shelley Marlow
|
|
|
|