Created 8th February 2006. ©Copyright Tbab.co.uk
Property of Shelley Marlow
This tutorial is written
and made in Psp Version 9 and assumes you have a working knowledge of Psp. It can be
made in earlier versions of Psp with a few adjustments, but for this tutorial I will
only be explaining how it was made in version 9.
You will need:-
JASC's PSP (free 30 day trial) which you can get here
Supplies which you can get here
which includes:-
Gradient - electric blues
Tubes - blueswirl and mtm voque
All of the above files are what I have aquired over a long period of time from following tutorials myself, if any of them belong to you, please email me so I may give you proper credit or remove them as you wish.
Plugins
Toadies - Blast 'em which you can get here
Vm Extravagnza - Transmission which you can get here
FM Tiles - Collage - circular free demo which you can get here
Eyecandy 5 - Glass which you can get here
Fonts
Chopinscript which you can get here
and cataclysmic which you can get here
Let's get started:-
To make the background:-
Open a new image 200 x 200 pixels transparent background
On you background colour choose Gradient - Electric Blue , Angle 45 , Repeat 0
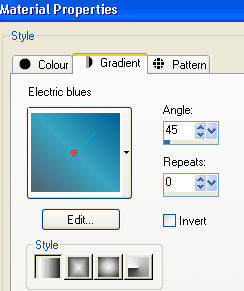
Flood fill your image.
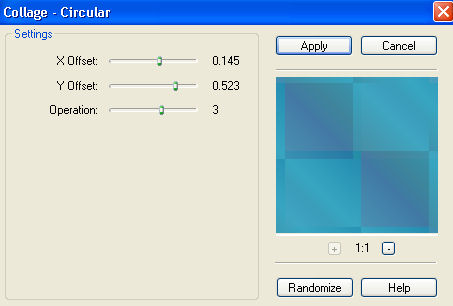
Go to Effects/Plugins/Fm Tiles/ Collage-Circular and use the following settings:-
Using your selection tool at rectangle , select two of the lighter shaded squares
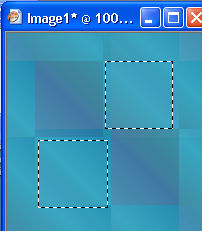
Create a new layer
Flood fill with 3EA4C0
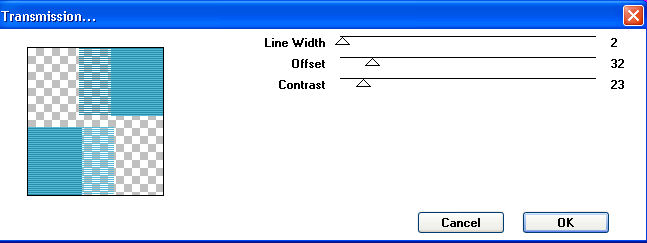
Go Effects/Plugins/VM Extravaganza/Transmission
Merge Visible your layers.
Save as a jpg.
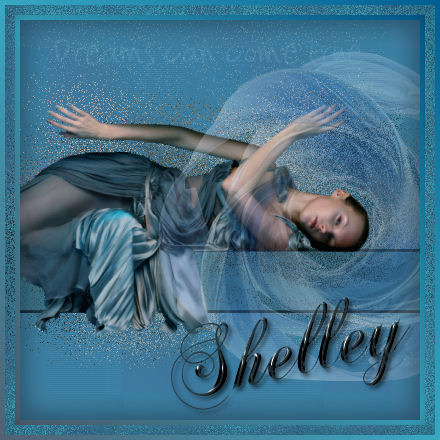
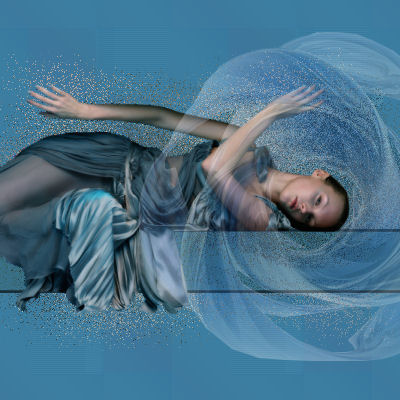
To make picture.
Open a new image 400 x 400 transparent
Flood fill with 3C769B
Create a new layer
On your background set your pattern to the image we had just created as a background angle 0 - repeats 0
Flood fill your image with the pattern
Lower opacity of this layer to 18
Open the tube. Go to Edit/copy
Make our new image and go to Edit/paste as a new layer
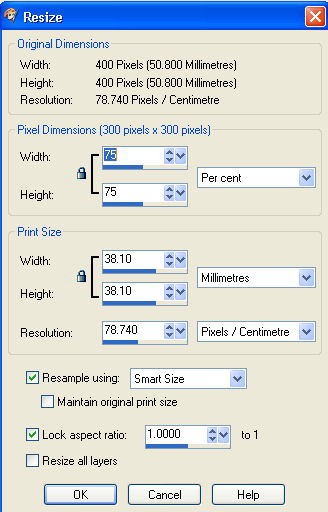
Go Image/resize
Make sure you are on the tube layer and with your mover tool move over to the left hand side of the image
Duplicate this layer twice, so we should now have three copies of the tube layer.
X out the top two layers of the tube.
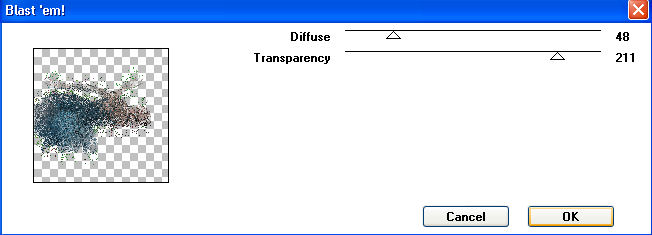
On the bottom tube layer go to Effects/Plugins/Toadies/Blast 'em
X out this layer. Go up one layer and un-X
Go to Effects/Plugins/Toadies/Blast 'em and use the same settings
Go to Image/mirror, then Image/flip, Lower the opacity of this layer to 58
Now you can un X the other two tube layers
Make sure your middle tube layer is highlighted.
Grab your your shape tool, set at rectangle
Set foreground colour at 162C35 and background colour to 39718B and draw a small rectangle the width of your image , but just deep enough so that it gives the illusion of the lady is resting her head or laying on a table
Change the layer blend mode to Darken
Highlight our top layer
Open the blue swirl tube. Go to Edit/Copy
Go back to our working image, Go to edit/paste as a new layer.
With your mover tool move the swirl so that the ladies head was in the middle of the swirl then reduce the opacity to 28
Select your text tool. Background colour 729BAD. Vector text, Cataclysmic font size 22
You can either use my wording or something of your own choosing. I used Dreams can come true. Convert this layer to a raster layer. Duplicate this layer. X out the top text layer. on the second text layer. Go to effects/toadies/blast'em using same settings as before . Lower the opacity of this layer to 16
Un x the top text layer on the blend mode change to Dodge and then change the opacity to 8
Save your file as a psp file, so that you can use at a later date should you wish to.
Make sure all layers are un-x'ed. Merge all layers visible.
Go to Image/add border 5 pixels
With your magic wand select the border and flood fill with the electric blue gradient we used in the making of the background.
While still selected add drop shadow
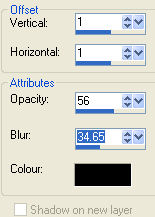
Add drop shadow again, except change the horizontal and vertical to minus 1
Go to selections/select none
go to image/add border 10 pixels flood fill with the pattern we used previously
Selections/select none
Go to image/add border 5 pixels flood fill with the gradient.
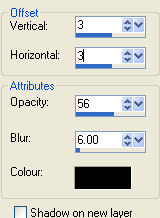
Add drop shadow as before.
Select your text tool, font chopin script size 72 and write your name. Position your text where you would like it.
Convert to raster layer
and finally I used eyecandy/glass on the text.
Add a drop shadow
For group tutorial purposes please use the materials provided and dont forget to put your name on using the text tool before posting to your group.
If you have any queries please dont hesitate to contact me:-

Please feel free to link to this tutorial, and/or print it out for your own personal use, but do not copy it in any way to put on-line, pass out, or re-write without my permission. Any resemblance to any other tutorial like this is purely coincidental.
Please respect my work by not claiming it as you own.
**NOTE--You may do anything you like with your results from these tutorials except make a profit from them. You got your results for free so let's keep it that way. Thank you! :o)
Created 8th February 2006. ©Copyright Tbab.co.uk
Property of Shelley Marlow
|
|
|
|