Created 22nd February 2006. ©Copyright Tbab.co.uk
Property of Shelley Marlow
Today we are going to be looking at your Brush tool .
This tutorial is written
and made in Psp Version 9 and assumes you have a working knowledge of Psp. It can be
made in earlier versions of Psp with a few adjustments, but for this tutorial I will
only be explaining how it was made in version 9.
You will need:-
JASC's PSP (free 30 day trial) which you can get here
My zipped file which contains Harrington Font, and the peony tube which is ©Zephyr, who has given the Schoolforpsp and More permission to use this tube. You can get it here
Let's get started:-
Step One
Unzip the supplies folder to your my documents. Double click on the font and keep it open but minimise it to your tool bar, ready to use later in the tutorial. Move the tube to your my documents/my psp files/picture tubes
Step Two
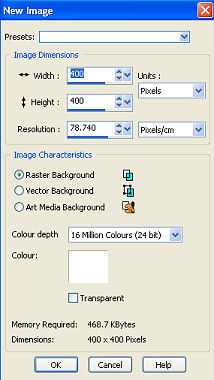
Go to File/New and use the following settings. We want a white background so make sure you take the check mark out of the transparent box, double click the colour box and select White.
Step Three
Go to Layers/New raster layer
Select your brush tool

and select the Surreal brush
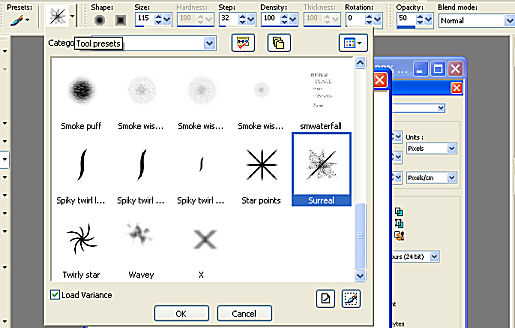
making sure your settings are the same as mine (which should be default for this particular brush)
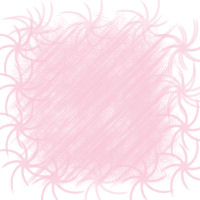
Change your foreground colour to #F9CADA
Drag your brush all over your work to create a light pattern over your white background. Leaving a border around the outside edge .
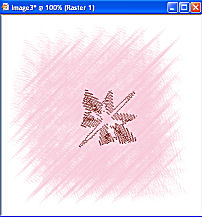
The more you drag the brush over your canvas the deeper the colour will become.
Step Four
Go to Layers/New raster layer. (If you keep your brush patterns on separate layers it means we can delete the layer if we are unhappy with our effects)
Change your brush to Twirly Star
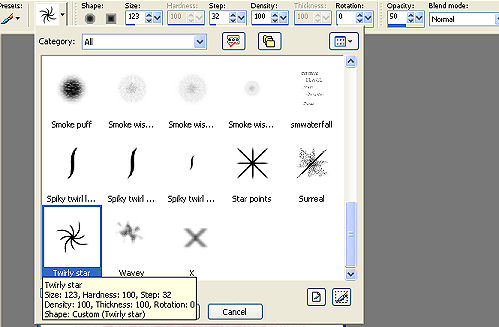
This time click your brush around the outside edge of your work and place the twirls like so
Step Five
Create a new raster layer using your tube tool  select the z_peony1 scale 55 and click once in the middle of your work. select the z_peony1 scale 55 and click once in the middle of your work.

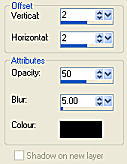
Go to effects/3d effects/drop shadow

Step Six
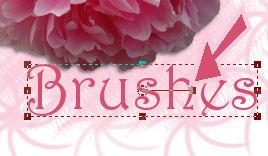
Select your text tool  and use the following settings and use the following settings

Change your background colour to #d54f70
Type your name
use the handle to turn on the slant, look at my picture at the beginning of the tutorial to see where I have placed my text
In you layer palette right click on your text layer and convert to raster layer .
Go to effects/3d effects/drop shadow and use the same settings as above
Step Seven
Make sure we are on the very top layer in the layer palette. If it is highlighted you are on the correct layer.
Go to selections/ select all
Go to selections/modify/contract/ by 15 pixels
Go to selections/invert
Select your flood fill tool  and fill with your background colour that you used for your text and fill with your background colour that you used for your text
Keep your marching ants selected around your border you have just created
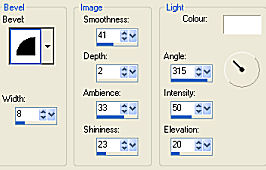
Go to Effects/3D effects/Inner Bevel and use the following settings
Still keeping the marching ants selected
Go to effects/3d effects/dropshadow
and use the following settings
Go to effects/3d effects/drop shadow this time change both the vertical and horizontal settings to -2 (minus 2)
Go to selections/select none
Go to File/Save as a psp file so that you can use it at a later date if you wish to .
Then go to File/export as a jpg
For group tutorial purposes please use the materials provided and dont forget to put your name on using the text tool before posting to your group.
If you have any queries please dont hesitate to contact me:-

Please feel free to link to this tutorial, and/or print it out for your own personal use, but do not copy it in any way to put on-line, pass out, or re-write without my permission. Any resemblance to any other tutorial like this is purely coincidental.
Please respect my work by not claiming it as you own.
**NOTE--You may do anything you like with your results from these tutorials except make a profit from them. You got your results for free so let's keep it that way. Thank you! :o)
Created 22nd February 2006. ©Copyright Tbab.co.uk
Property of Shelley Marlow
|
|
|
|