
Created 5th February 2006. ©Copyright Tbab.co.uk
Property of Shelley Marlow
This tutorial is written
and made in Psp Version 9 and assumes you have a working knowledge of Psp. It can be
made in earlier versions of Psp with a few adjustments, but for this tutorial I will
only be explaining how it was made in version 9.
You will need:-
JASC's PSP (free 30 day trial) which you can get here
Supplies which you can get here
which includes:-
- 2 fonts - Adorable and hamlake save to your fonts folder
- Brushtip and cloud9_roses save to your brush folder
- Tube - © Rainbow Coffi . I have been given permission to offer the tube for download, but please also take the time to look at some of her work here
- Preset shape - cp-heartv8 save to your preset shapes folder
All of the above files are what I have aquired over a long period of time from following tutorials myself, if any of them belong to you, please email me so I may give you proper credit or remove them as you wish.
Dsb flux plugin - which you can get here
Alienskin - Eyecandy5 Impact which you can get here
Let's get started:-
Go to File/new and open up a new image 500 x 500 transparent image.
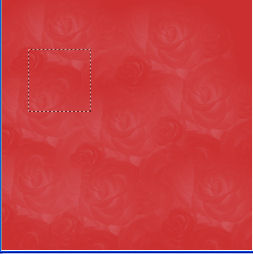
Set your background colour to CB2F2F and flood fill your image.
Create a new raster layer
Select your brush tool and choose cloud9_roses

Set your foreground colour to E4D2EA
Using the brush click a few times over the background and then once your happy lower the opacity of this layer to about 22.
Create a new layer
With your selection tool

draw out a square in the top left hand side like so
Flood fill with background colour of BA1C1C
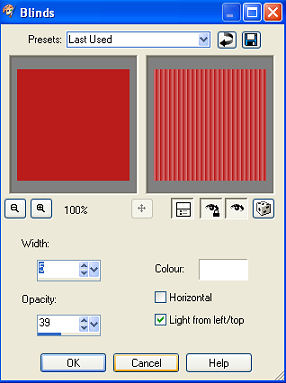
Go to effects/Texture effects/Blinds and use the following settings
Go to selections/select none.
right click on the layer and duplicate
Using your mover tool move one of the squares down below the other one with a little gap in between.
make sure your top layer is highlighted and select your preshape tool.

Your background colour should still be the same as above of BA1C1C
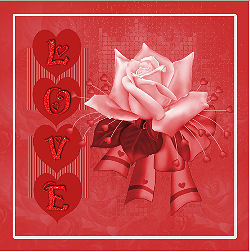
Draw out a heart shape roughly the same size as you can see in my main picture at the top of this page.
right click on the vector layer and convert to a raster layer. Duplicate this layer 3 times so you have a total of four hearts and arrange the hearts in a line going downwards over your squares.
you should have something like this

X out your bottom two layers. Which should be your solid background layer and your rose layer with the opacity taken down. Make sure you are on the very top layer. Right click and merge/merge visible. On the merged layer right click and rename hearts.
Right click the layer again and go to View/ All
highlight the layer below the hearts layer- this should be raster layer 2 .
Open the rose tube that came with the tutorial.
go to edit/copy and then minimise the tube
Back on our working image, go to Edit/paste as a new layer
It should appear behind the back of our hearts and squares dont worry that is fine its where we want it.
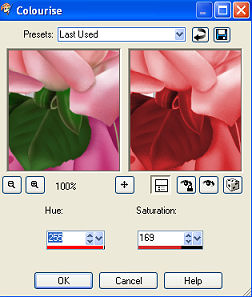
Go to Adjust/hue and saturation/colourise and use the following settings
Duplicate this layer and then x out the duplicate and work on raster layer 3 which is the original tube layer.
With your mover tool move the rose into position as far to the right as you can without loosing any of the hearts.
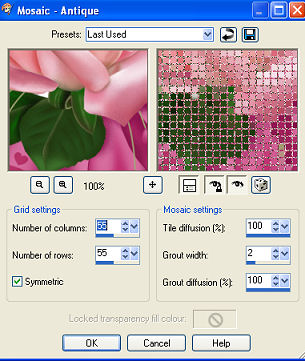
Go to Effects/Texture effects/ Mosaic - Antique and use the following settings
Reduce the opacity of this layer to 18
Un x the copy of the tube layer and right click the layer and go to arrange/bring to top
this layer should now be our top layer
Go to Image/Resize and resize to 80% bicubic sample make sure all layers is unchecked.
Using your mover tool move the rose slightly to the right like my sample tag at the top of the page.
Open the font hamlake at your fonts folder.
Make sure we are still on the top layer
select your font tool and use the following settings

Change the background colour to EF1F1F
Use all captial letters. Type out the letter L and click ok then position it over your the top heart.
Using the text tool, again using caps, type out the letter O and place it over the second heart
Using the text tool , using caps, type out the letter V and place over the third heart
Using the text tool, using caps, type out the letter E and place over the third heart.
Once your happy that each individual letter is in the correct place you can go to the vector layer and right click and convert to raster layer. Once we have converted the letters will all be one layer fixed and will all move together and not individually.
Right click this layer and go to View/current layer only.
Go to selections/ select all, then selections/float and then selections/defloat.
You should now have the marching ants around your wording. With it still selected duplicate this layer twice for a total of three text layers. rename them all starting with the bottom one text 1, text 2, text 3
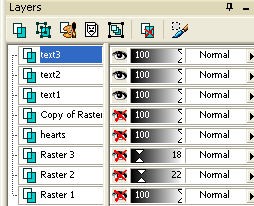
this is what your layer pallette should look like now
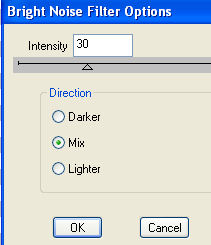
highlight our text 3 layer and go to Effects/plugins/dsb flux/bright noise . DO NOT deselect yet.
X out text 3 layer and highlight text 2 layer and use the same settings as above for dsbflux, but do it twice on the same layer. Then X out text 2 layer and highlight our text 1 layer.
Use the same settings as above for dsbflux , but do it three times on this layer.
Keep the text selected we havent finished with it yet.
On each of the three text layers you now need to apply eyecandy to them.
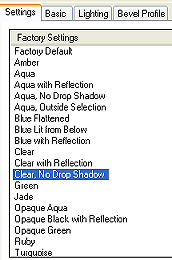
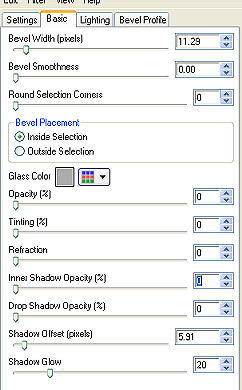
So on text1 layer that we still have highlighted go to effects/plugins/alienskin eyecandy5 impact/Glass and use the following settings
Do the above for text layer 2 and 3
Right click on text 3 layer and go to view/all
You can now deselect the marching ants by going to selections/select none
go to effects/dropshadow and use the following settings
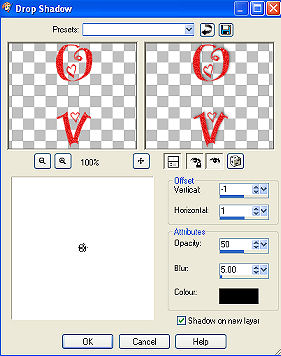
do the above step again for the drop shadow on text layers 2 and 1
Once again hightlight text 3 layer and then create a new layer
go to selections/select all
selections/modify/contract by 30
go to selections/invert
flood fill with your foreground colour of f8e1e1
go to selections select none.
On the layer palette right click on the layer and go to view/current only
with your magic wand select the inside of the frame you just made
on your layer palette go to view/all
go to selections/modify/expand by 5
go to selections/invert and then hit delete on your keyboard you should now be left with this
Using your magic wand, select the pink frame we just made and then go to effects/dropshadow
using these settings

then redo the dropshadow changing the vertical and horizontal settings to -1
Selections/select none
Selections/select all
Selections/modify/contract by 20
Selections/invert
Go to effects/plugins/alienskin eyecandy 5 impact/glass and use the same settings as earlier
Go to selections/select none/
Using your text tool, add your name to your work.
Once your happy we are now going to animate the picture, make sure you have saved as a psp file, do not merge layers.
X out layers text1 and text 2
Make sure your on very top layer and right click and go merge/merge visible
go to edit/copy
Open animation shop
Go to edit/paste as a new animation.
Go back to your work in psp. go to edit/undo merge
X out text 3 layer and un X text 2 layer. Make sure your top layer is highlighted, right click and merge visible
go to edit/copy
Go back to animation shop and go to edit/paste after current frame
make sure the second frame is now highlighted with the blue around it.
Go back to psp and go to edit/undo merge visible
X out text2 layer and un X text1 layer. Make sure your top layer is highlighted, right click and merge visible
go to edit/copy
go back to animation shop and go to edit/paste after current frame.
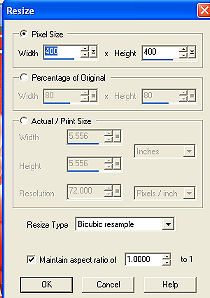
Go to animation/resize animation and resize to 400 x 400 pixels
Now you can save your work go to file/save as and name your file.
Go back to psp and go to edit/undo merge visible. save your file as a psp file for you to use at a later date should you wish to.
You have now finished the tutorial.
Phewwwy that was a long one!!
For group tutorial purposes please use the materials provided and dont forget to put your name on using the text tool before posting to your group.
If you have any queries please dont hesitate to contact me:-

Please feel free to link to this tutorial, and/or print it out for your own personal use, but do not copy it in any way to put on-line, pass out, or re-write without my permission. Any resemblance to any other tutorial like this is purely coincidental.
Please respect my work by not claiming it as you own.
**NOTE--You may do anything you like with your results from these tutorials except make a profit from them. You got your results for free so let's keep it that way. Thank you! :o)
Created 5th February 2006. ©Copyright Tbab.co.uk
Property of Shelley Marlow
|
|
|
|